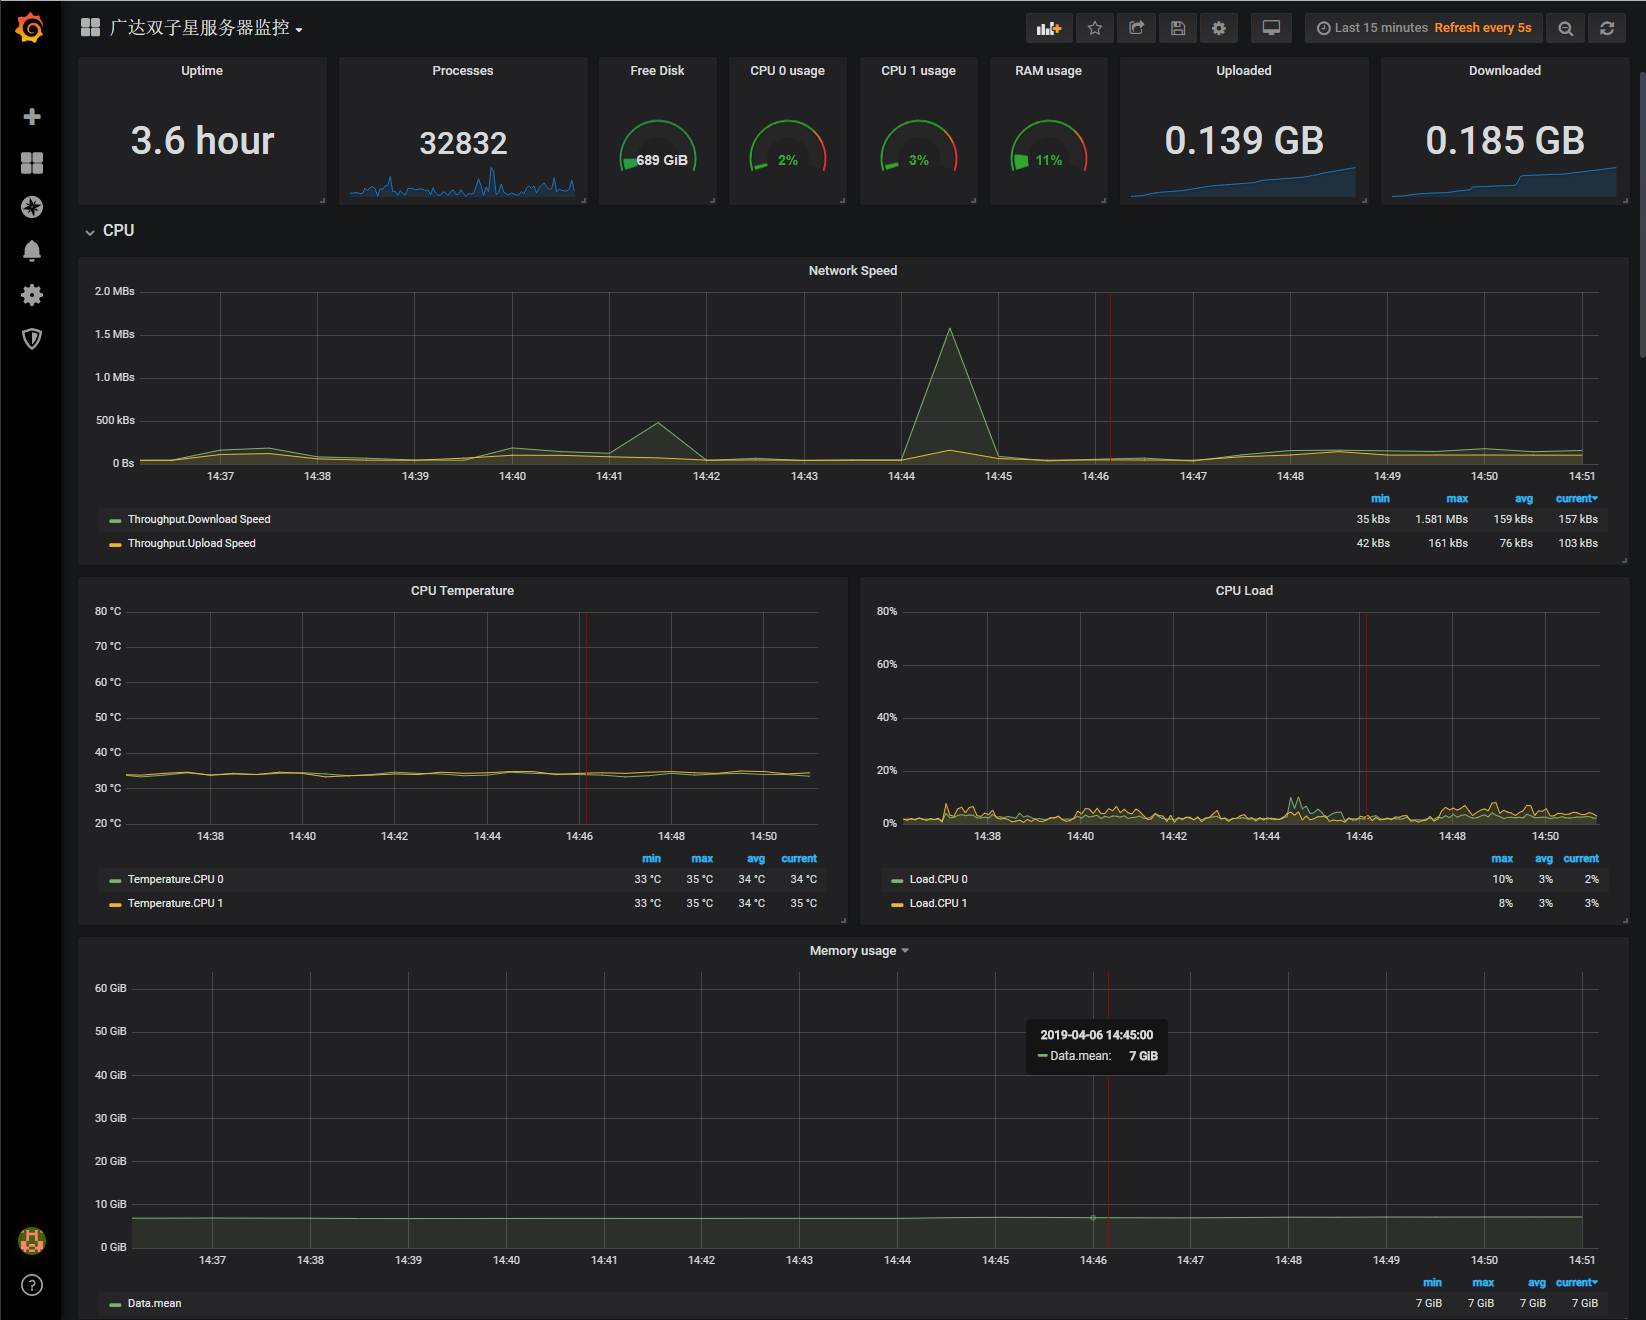
在上一篇博文中,我在树莓派中搭建好了InfluxDB数据库和Grafana可视化工具,目的是为了监控服务器性能,本篇便要讲讲怎么把服务器的实时状态推到InfluxDB以及Grafana的可视化配置。
服务器信息采集
采集服务器状态信息的工具有很多,比如七牛的Logkit,我是通过Logkit了解到InfluxDB和Grafana的,但是在配置Logkit的时候,始终无法将状态信息推到InfluxDB中,推到InfluxDB中的信息只有时间戳,几经周折,最终放弃,选择了InfluxData的全家桶--Telegraf,除了Telegraf之外,我还使用了OhmGraphite这个工具监控服务器的硬件信息如温度等。
安装Telegraf
Linux
Telegraf也是跨平台的,到官网直接下载就行了。Linux以CentOS为例:
root@centos_x86:~ $ wget https://dl.influxdata.com/telegraf/releases/telegraf-1.10.2-1.x86_64.rpm
root@centos_x86:~ $ yum localinstall telegraf-1.10.2-1.x86_64.rpm
安装完成后编辑配置文件
root@centos_x86:~ $ vim /etc/telegraf/telegraf.conf
找到OUTPUT PLUGINS中的 # urls = ["http://127.0.0.1:8086"] 去掉注释并将ip更改为InfluxDB的ip
找到 # database = "telegraf" 去掉注释并将database更改为你手动创建的数据库或保持默认也可
###############################################################################
#                            OUTPUT PLUGINS                                   #
###############################################################################
# Configuration for sending metrics to InfluxDB
[[outputs.influxdb]]
  ## The full HTTP or UDP URL for your InfluxDB instance.
  ##
  ## Multiple URLs can be specified for a single cluster, only ONE of the
  ## urls will be written to each interval.
  # urls = ["unix:///var/run/influxdb.sock"]
  # urls = ["udp://127.0.0.1:8089"]
   urls = ["http://192.168.1.121:8086"]
  ## The target database for metrics; will be created as needed.
  ## For UDP url endpoint database needs to be configured on server side.
   database = "ServerMonitor"
修改后保存,启动telegraf
root@centos_x86:~ $ service telegraf start
此时,在树莓派上用influx命令连接influxdb,可以看到已经有数据提交进数据库中了。
pi@raspberrypi:~ $ influx
Connected to http://localhost:8086 version 1.7.5
InfluxDB shell version: 1.7.5
Enter an InfluxQL query
> show databases
name: databases
name
----
_internal
ServerMonitor
> use ServerMonitor
> show MEASUREMENTS
name: measurements
name
----
cpu
disk
diskio
kernel
mem
processes
swap
system
> SELECT * FROM "system" WHERE time > now() - 5m
name: system
time                host         load1 load15 load5 n_cpus n_users uptime  uptime_format
----                ----         ----- ------ ----- ------ ------- ------  -------------
1554527710000000000 test.localhost 0     0.05   0.03  2      2       2554043 29 days, 13:27
1554527720000000000 test.localhost 0     0.05   0.03  2      2       2554053 29 days, 13:27
1554527730000000000 test.localhost 0     0.05   0.03  2      2       2554063 29 days, 13:27
1554527740000000000 test.localhost 0     0.05   0.03  2      2       2554073 29 days, 13:27
1554527750000000000 test.localhost 0.08  0.05   0.05  2      2       2554083 29 days, 13:28
1554527760000000000 test.localhost 0.07  0.05   0.04  2      2       2554093 29 days, 13:28
1554527770000000000 test.localhost 0.06  0.05   0.04  2      2       2554103 29 days, 13:28
1554527780000000000 test.localhost 0.05  0.05   0.04  2      2       2554113 29 days, 13:28
telegraf就安装成功了,最后设置telegraf开机启动
root@centos_x86:~ $ systemctl enable telegraf
Windows
Windows系统中的telegraf寻找conf配置文件的方式有些奇葩,运行时会提示找不到配置文件
C:\Users\Administrator\Desktop\Telegraf>telegraf.exe
2019-04-06T05:29:30Z I! Starting Telegraf 1.10.2
2019-04-06T05:29:30Z E! [telegraf] Error running agent: No config file specified, and could not find one in $TELEGRAF_CONFIG_PATH, /.telegraf/telegraf.conf, or C:\Program Files\Telegraf\telegraf.conf
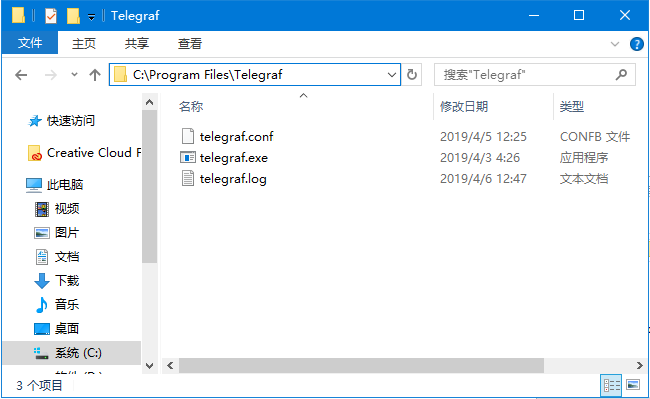
所以须将telegraf下载后解压到C:\Program Files\Telegraf中,配置文件在 C:\Program Files\Telegraf\telegraf.conf才行。如图:
运行,没有报错。
C:\Program Files\Telegraf>telegraf.exe
2019-04-06T05:36:02Z I! Starting Telegraf 1.10.2
2019-04-06T05:36:02Z I! Using config file: C:\Program Files\Telegraf\telegraf.conf
在到InfluxDB中看MEASUREMENTS,多出了win_开头的MEASUREMENTS,select查看,也有相应的数据。安装完成
> show MEASUREMENTS
name: measurements
name
----
cpu
disk
diskio
kernel
mem
processes
swap
system
win_cpu
win_disk
win_diskio
win_mem
win_net
win_swap
win_system
> SELECT * FROM "win_system" WHERE time > now() - 5m
name: win_system
time                Context_Switches_persec Processor_Queue_Length System_Calls_persec System_Up_Time  host          objectname
----                ----------------------- ---------------------- ------------------- --------------  ----          ----------
1554528972000000000 7419.20947265625        0                      15043.705078125     8481.599609375  Inspiron-3568 System
1554528980000000000 8773.0634765625         1                      18612.896484375     8489.5078125    Inspiron-3568 System
1554528990000000000 7786.3330078125         0                      17157.470703125     8499.5078125    Inspiron-3568 System
1554529000000000000 8942.4306640625         0                      17806.150390625     8509.505859375  Inspiron-3568 System
1554529010000000000 9173.82421875           1                      20569.35546875      8519.5068359375 Inspiron-3568 System
1554529020000000000 9843.0908203125         0                      23196.314453125     8529.5068359375 Inspiron-3568 System
最后,也是设置Telegraf随Windows开机启动
Telegraf原生支持以Window服务的形式运行,参考https://github.com/influxdata/telegraf/blob/master/docs/WINDOWS_SERVICE.md
安装Telegraf为service,启动service即可
C:\Users\Administrator>"C:\Program Files\Telegraf\telegraf.exe" --service install
C:\Users\Administrator>net start telegraf
OhmGraphite
OhmGraphite是偏向硬件的系统检测工具,我只用它检测我的广达双子星矿渣服务器,以防止温度过高BOOM了,配置和安装方法与telegraf相似,不在赘述。
InfluxDBStudio
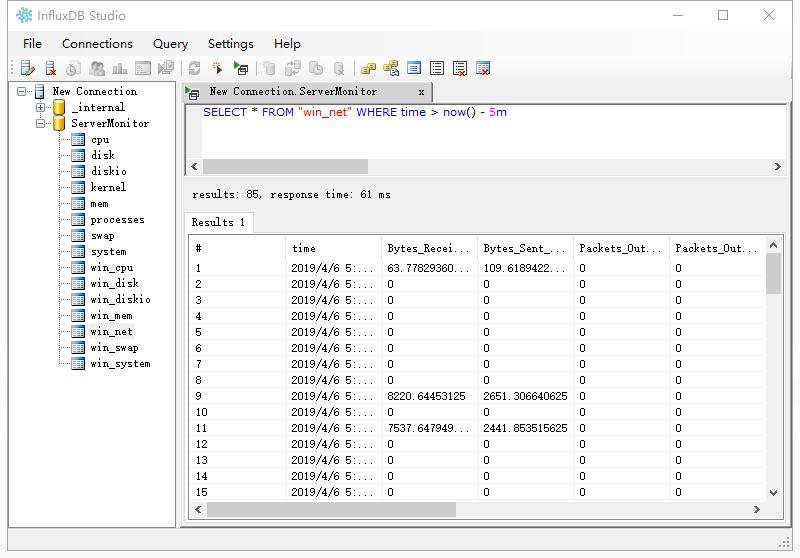
如果你觉得在命令行中操作InfluxDB有些麻烦,你可以试试InfluxDBStudio,一个在Windows平台下的开源数据库管理工具。
下载地址[Github]
https://github.com/CymaticLabs/InfluxDBStudio/releases
配置Grafana
打开你的浏览器,输入Grafana的ip地址和端口号,用户名/密码 admin/admin登陆进去后,提示设置新密码,设置你的密码。
根据面板提示设置数据源
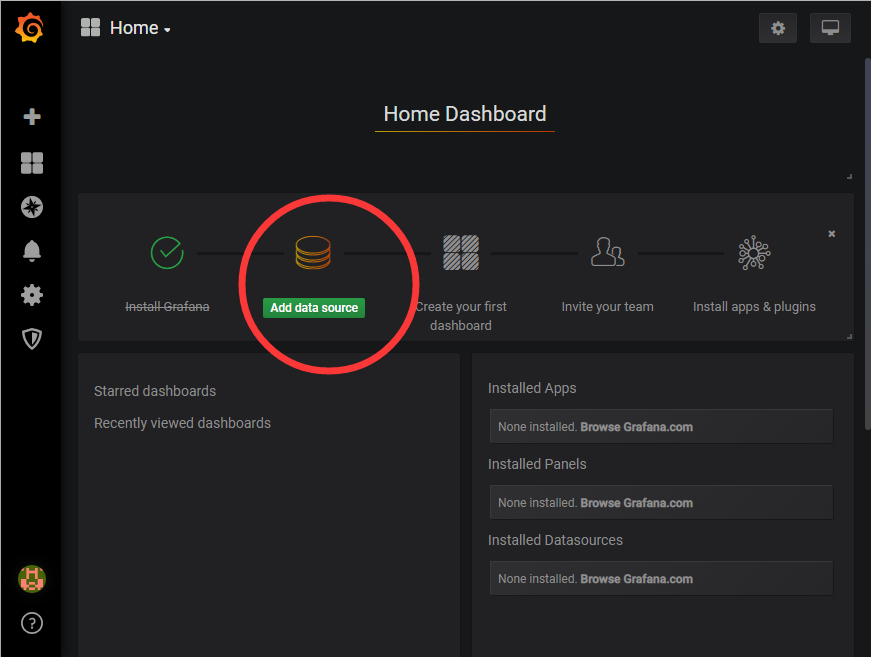
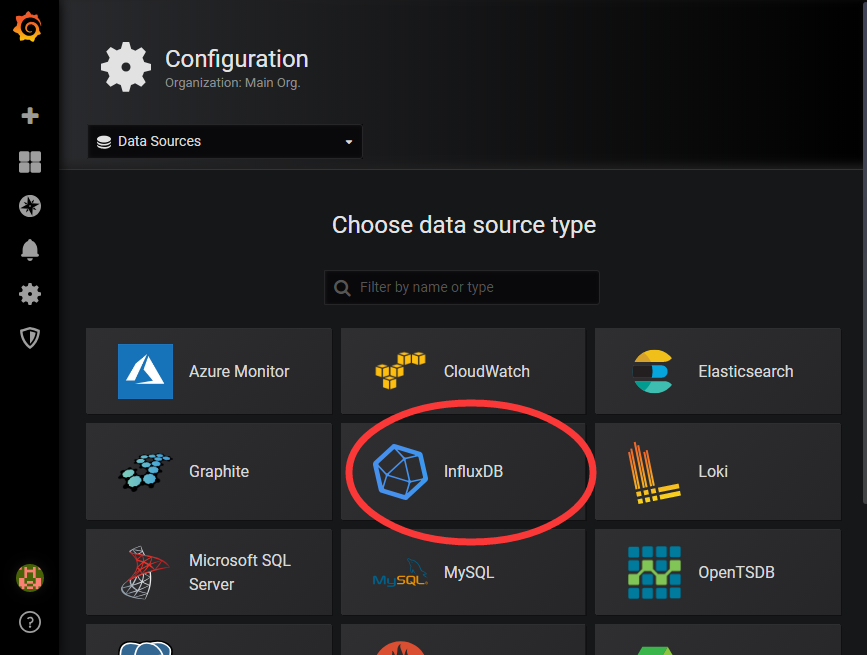
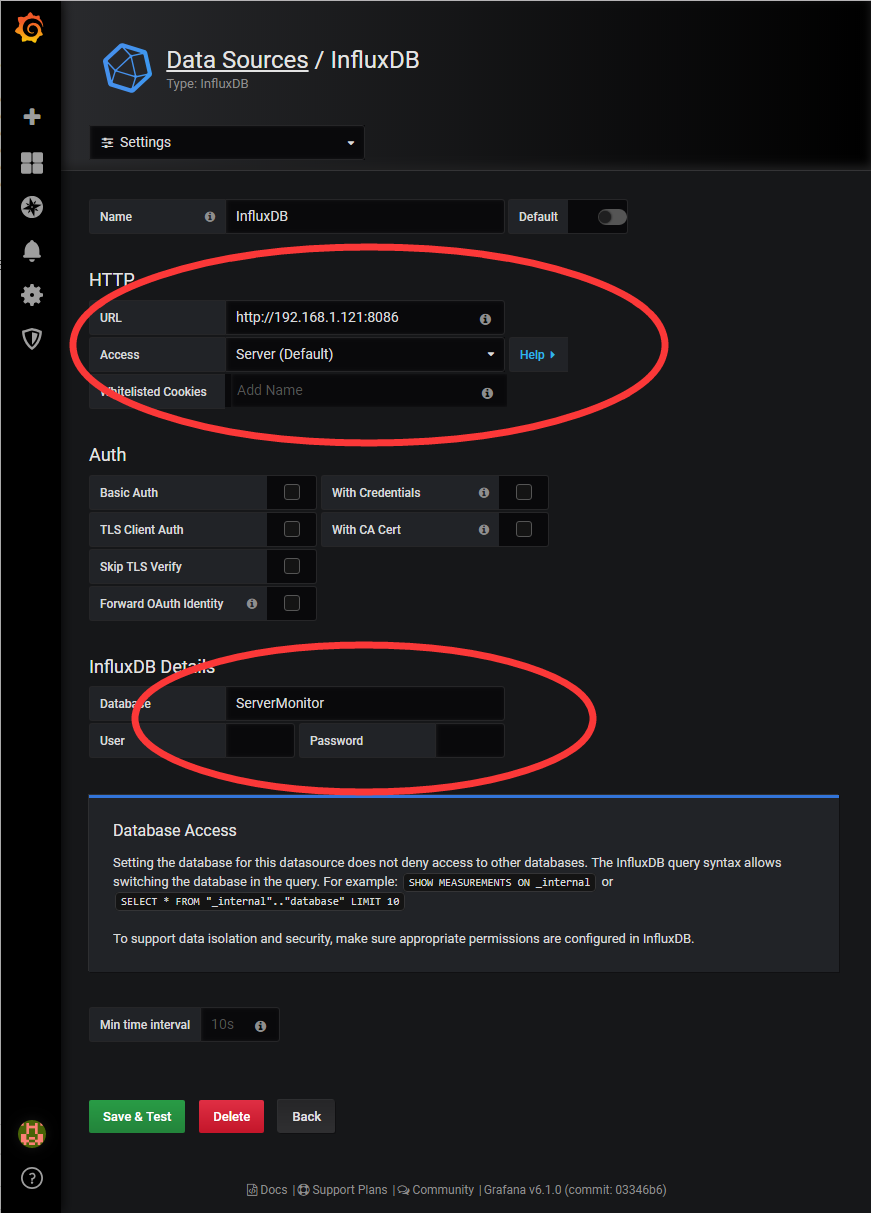
信息填写完整后点击Save & Test,提示 Data source is working 后点击Back
在左上角点击+号,创建一个DashBoard
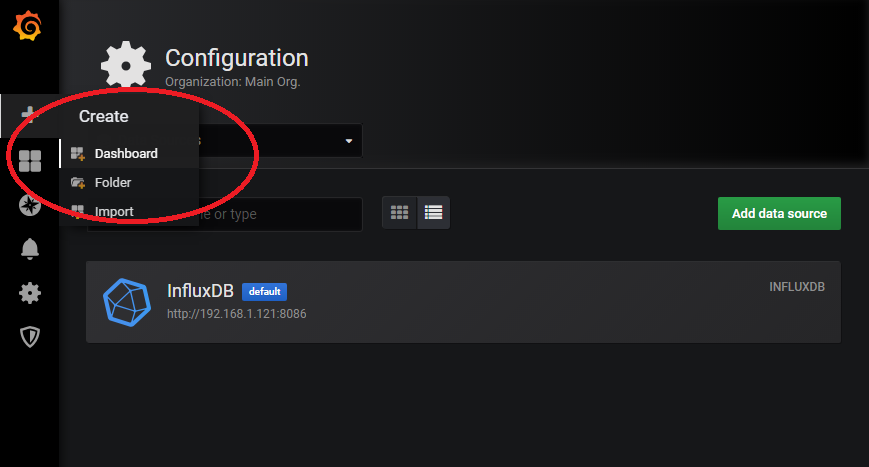
点击Add Query添加数据查询
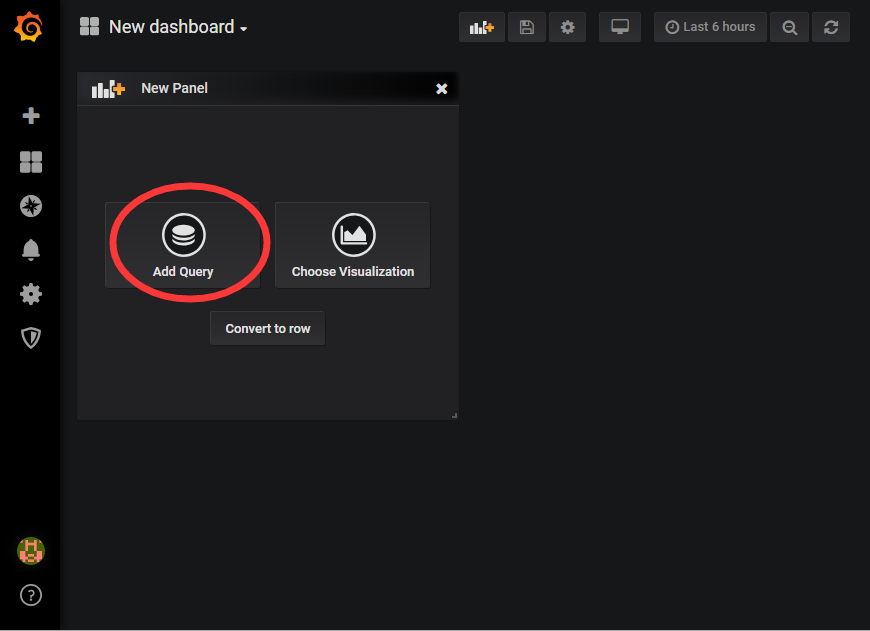
依此设置Queries(数据查询),Visualization(可视化设置)、General(设置标题)、Alert(报警,可选),设置完成后点击右上角的保存!
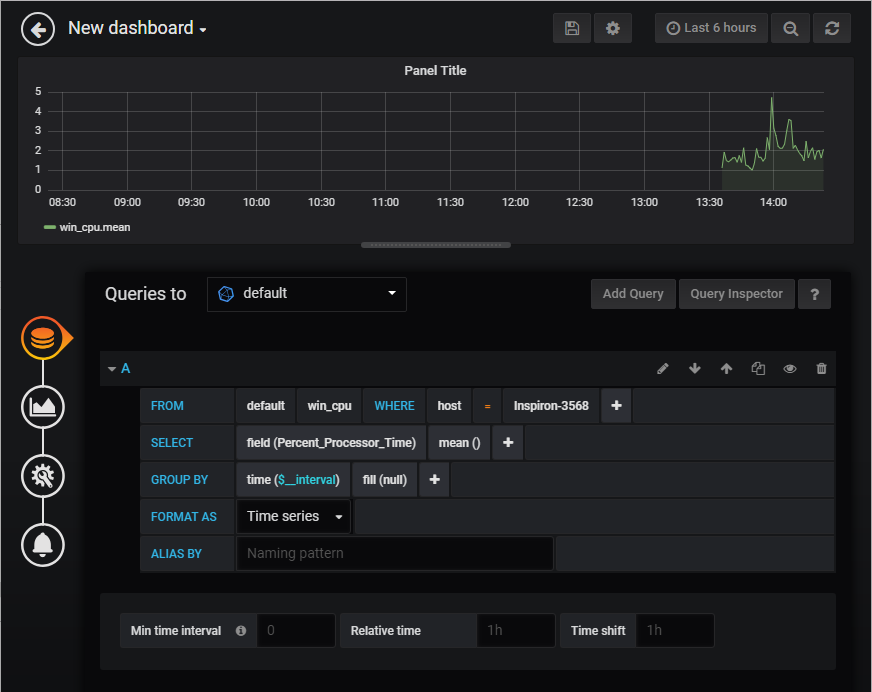
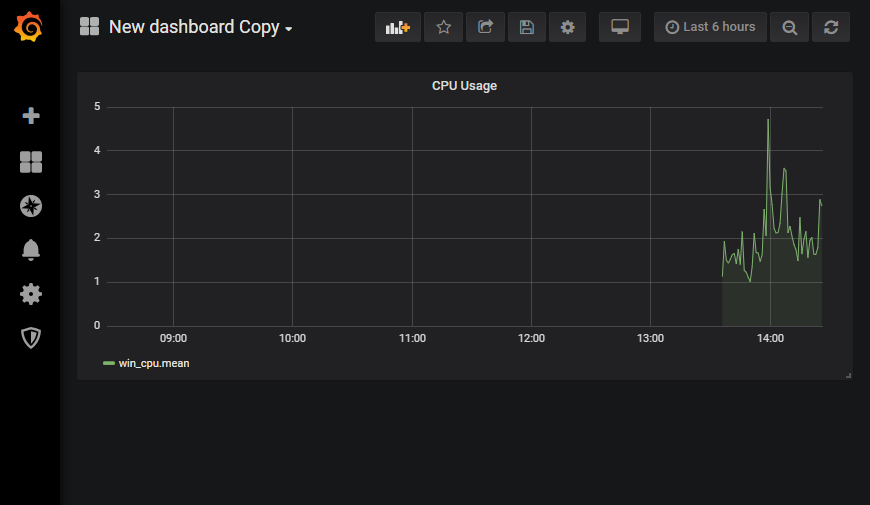
这样,就得到了一个简单的CPU占用率的图表,其他指标也是一样的设置方法。
Error!
都说程序员不care警告……但这个警告真的很重要
创建图表之后回到Dashboard后,Dashboard也要保存!
Dashboard也要保存!
Dashboard也要保存!
Dashboard也要保存!
不然下次登陆了就没有了!
成果展示
